Condenser Lens Replacement
We recently discovered that some OpenFlexure microscope kits were shipped with an incorrect condenser lens. We sincerely apologise for this error and any inconvenience it may cause. The microscope will still work with the incorrect lens, but it does not fit securely and may fall out during use. This guide will help you identify the incorrect lens and install the replacement.
To identify the correct lens, look for the lip around the edge of the lens. The correct lens will have a lip, while the incorrect lens will not.
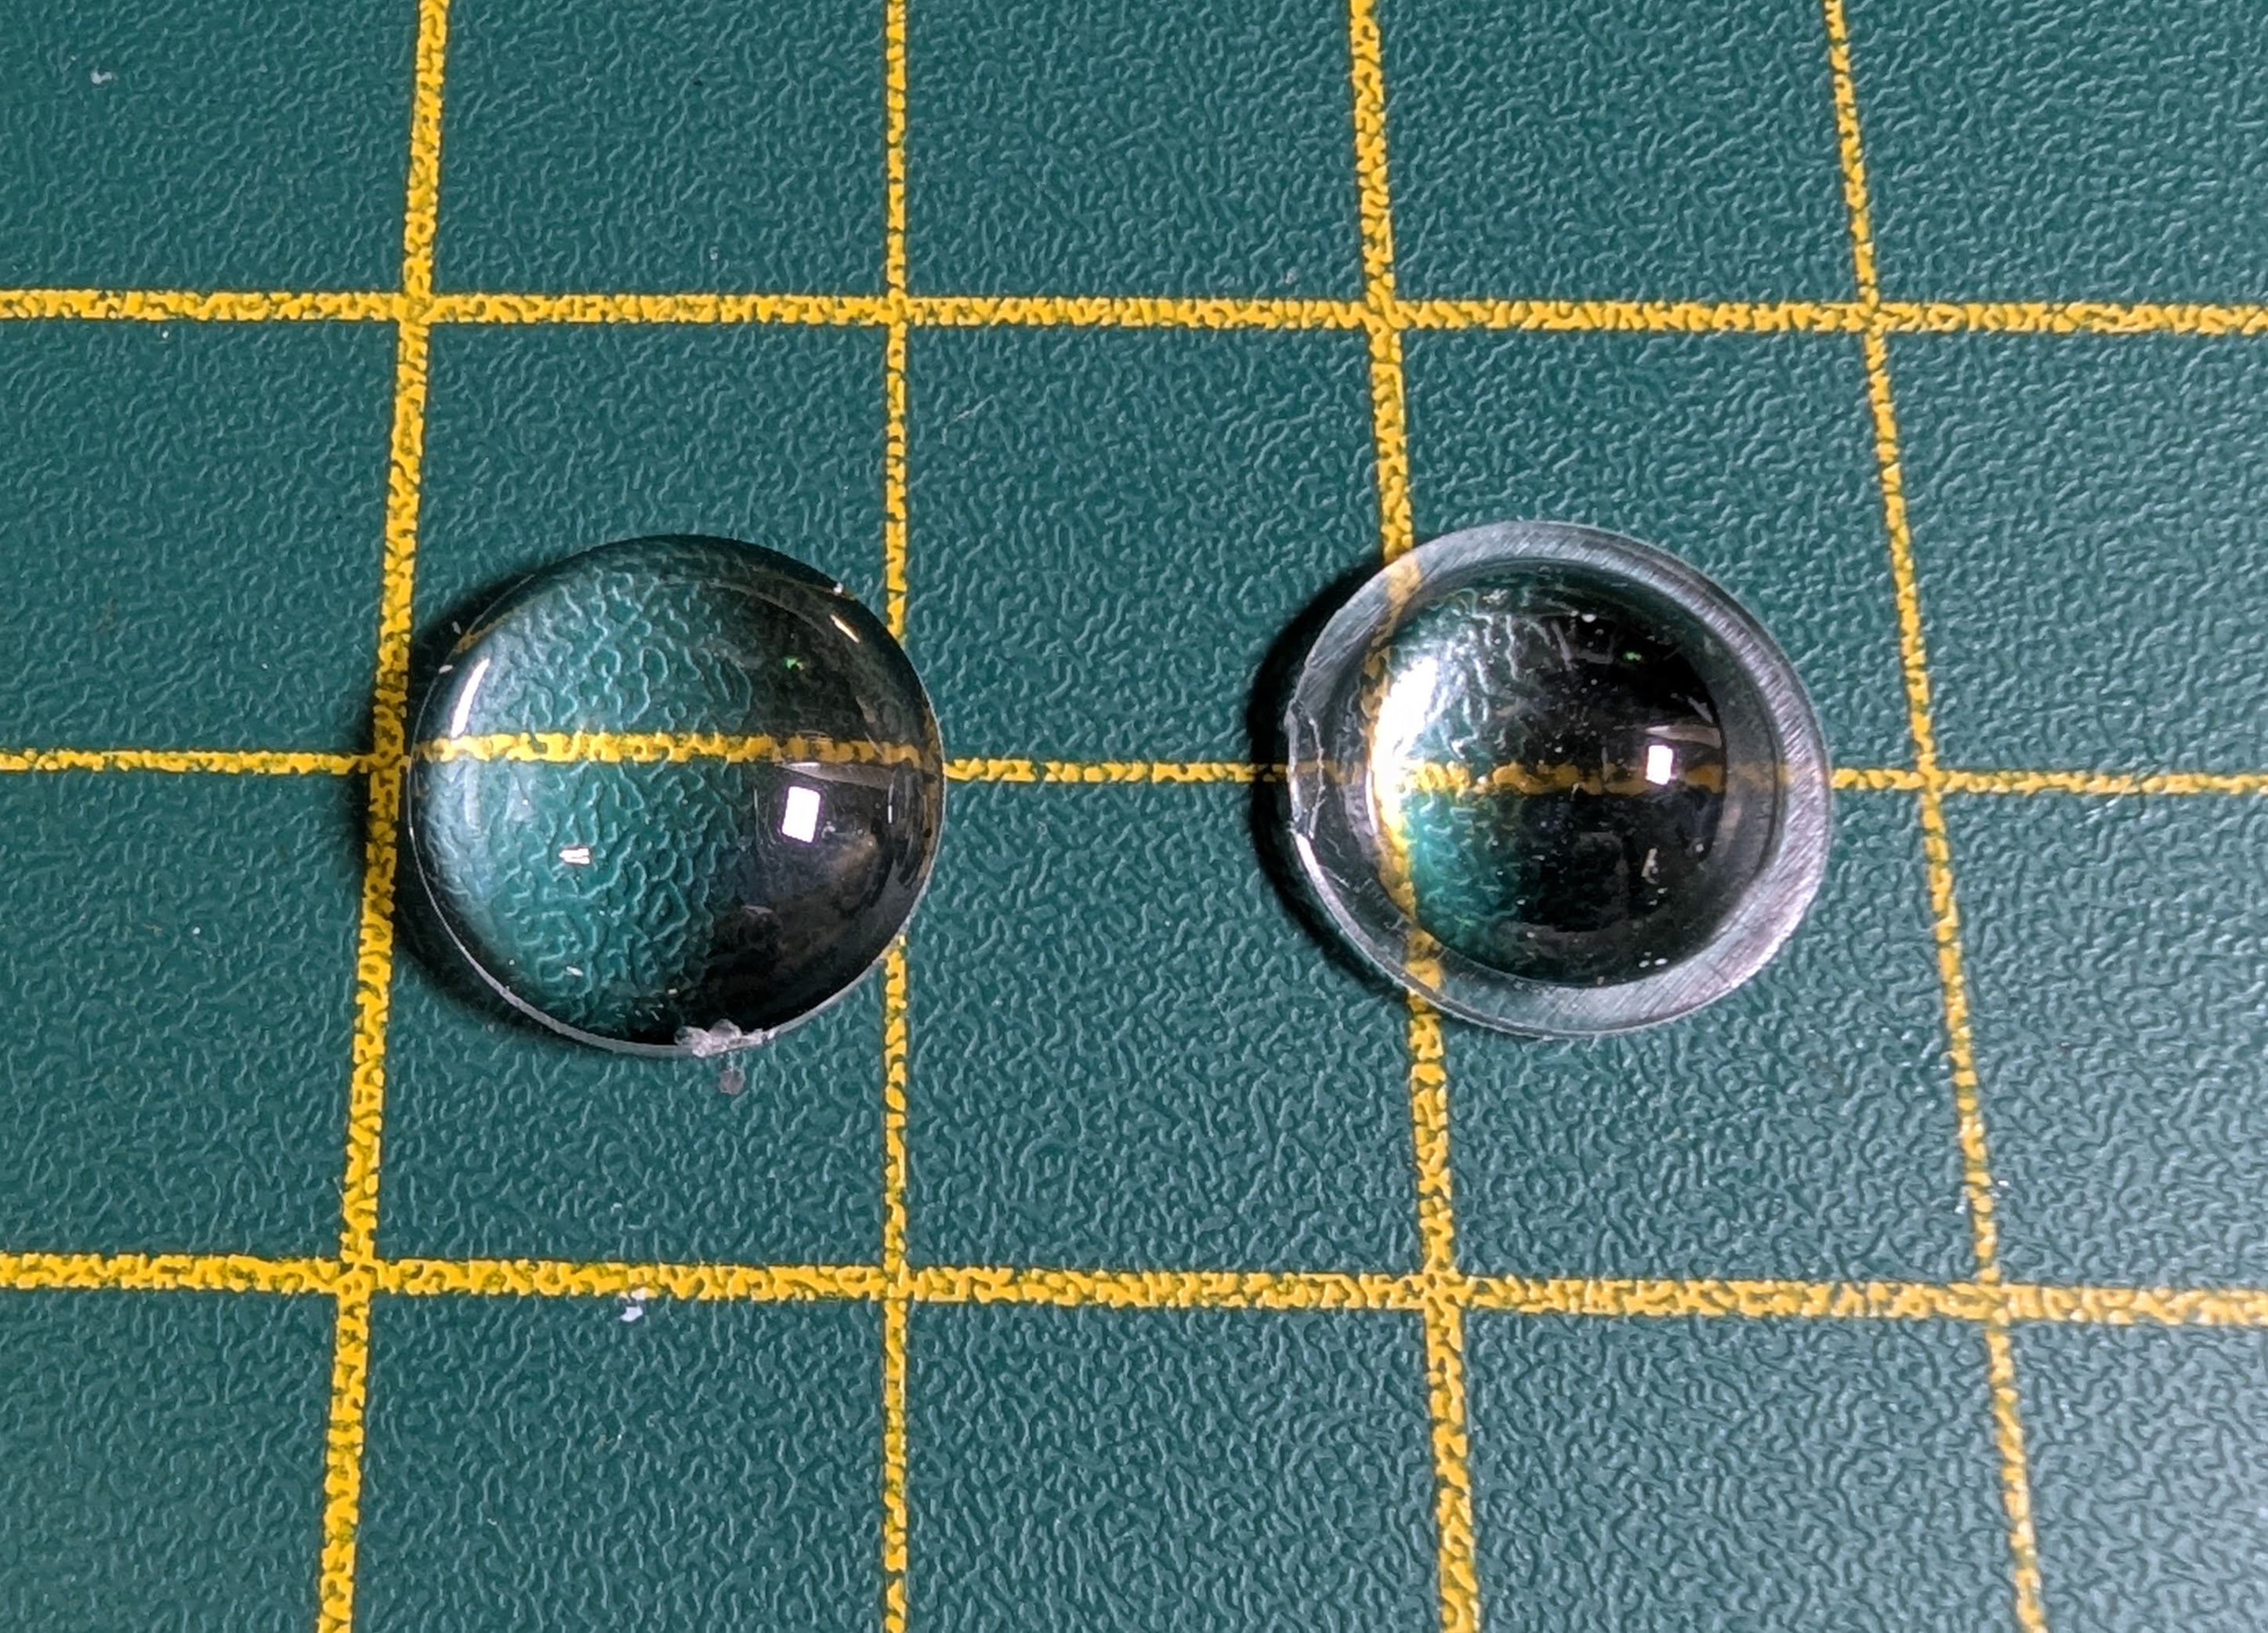
Incorrect lens without lip on left, correct lens with lip on the right.
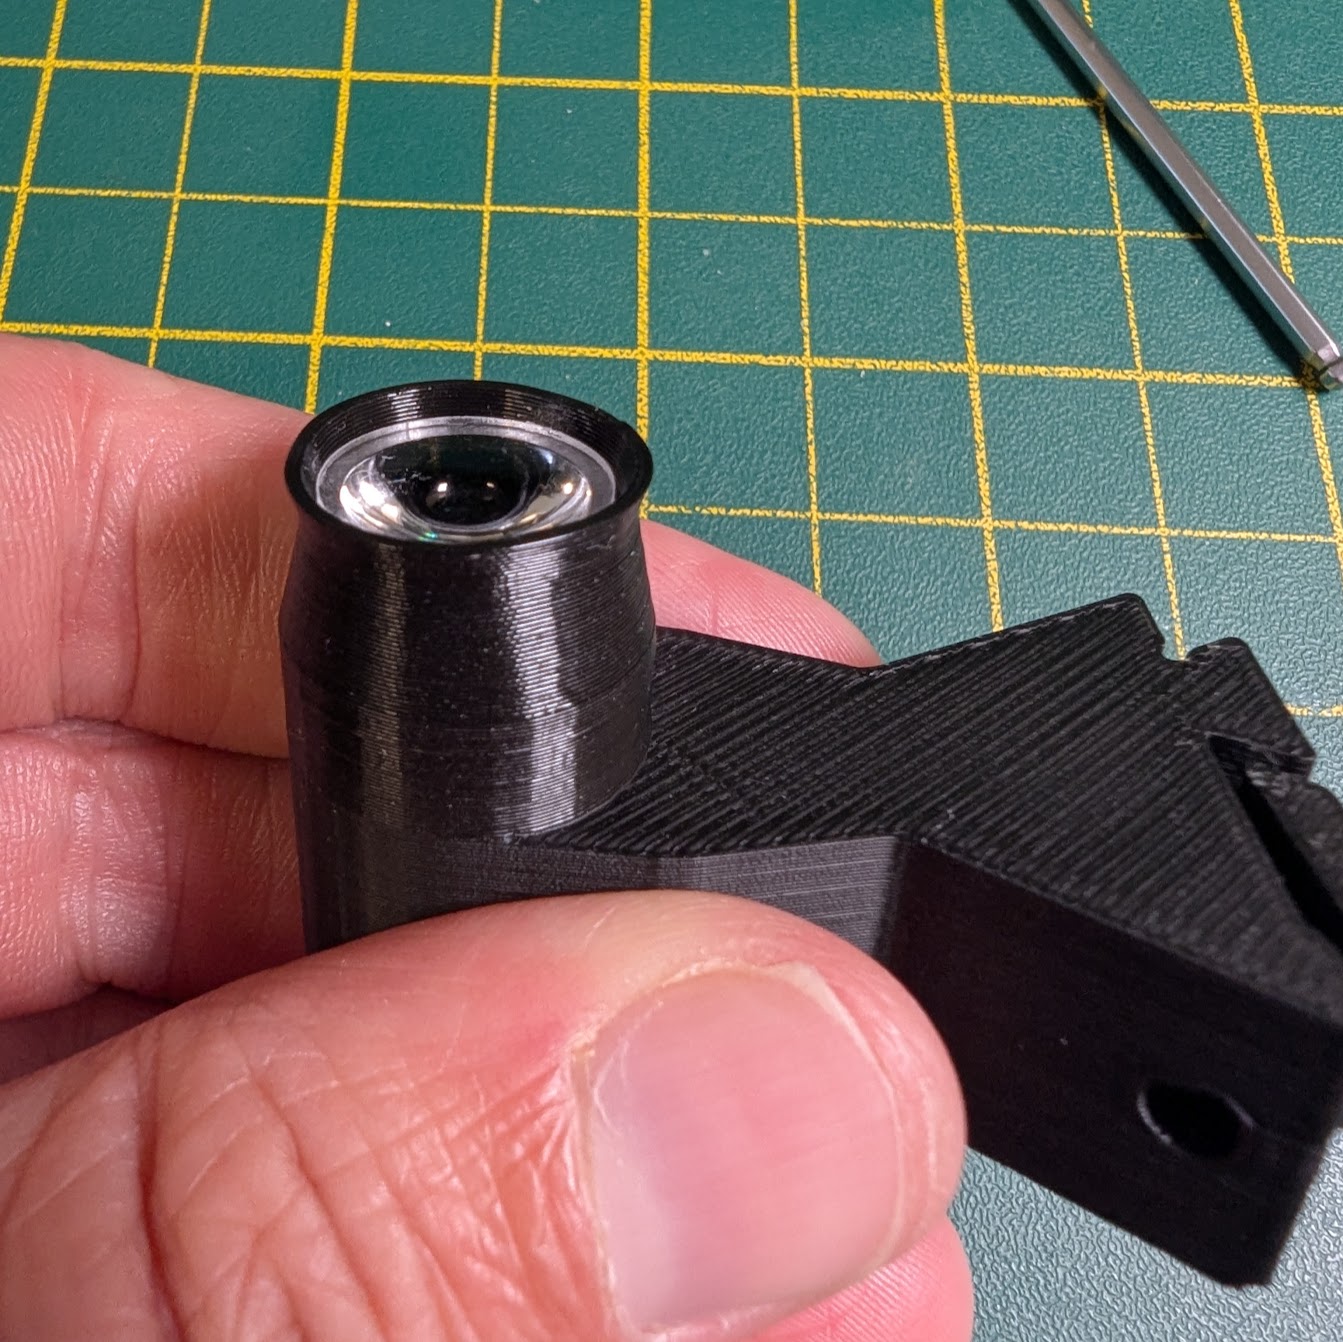
If your lens is already installed, you can check if it's the wrong lens by checking if it portrudes from the condenser arm:
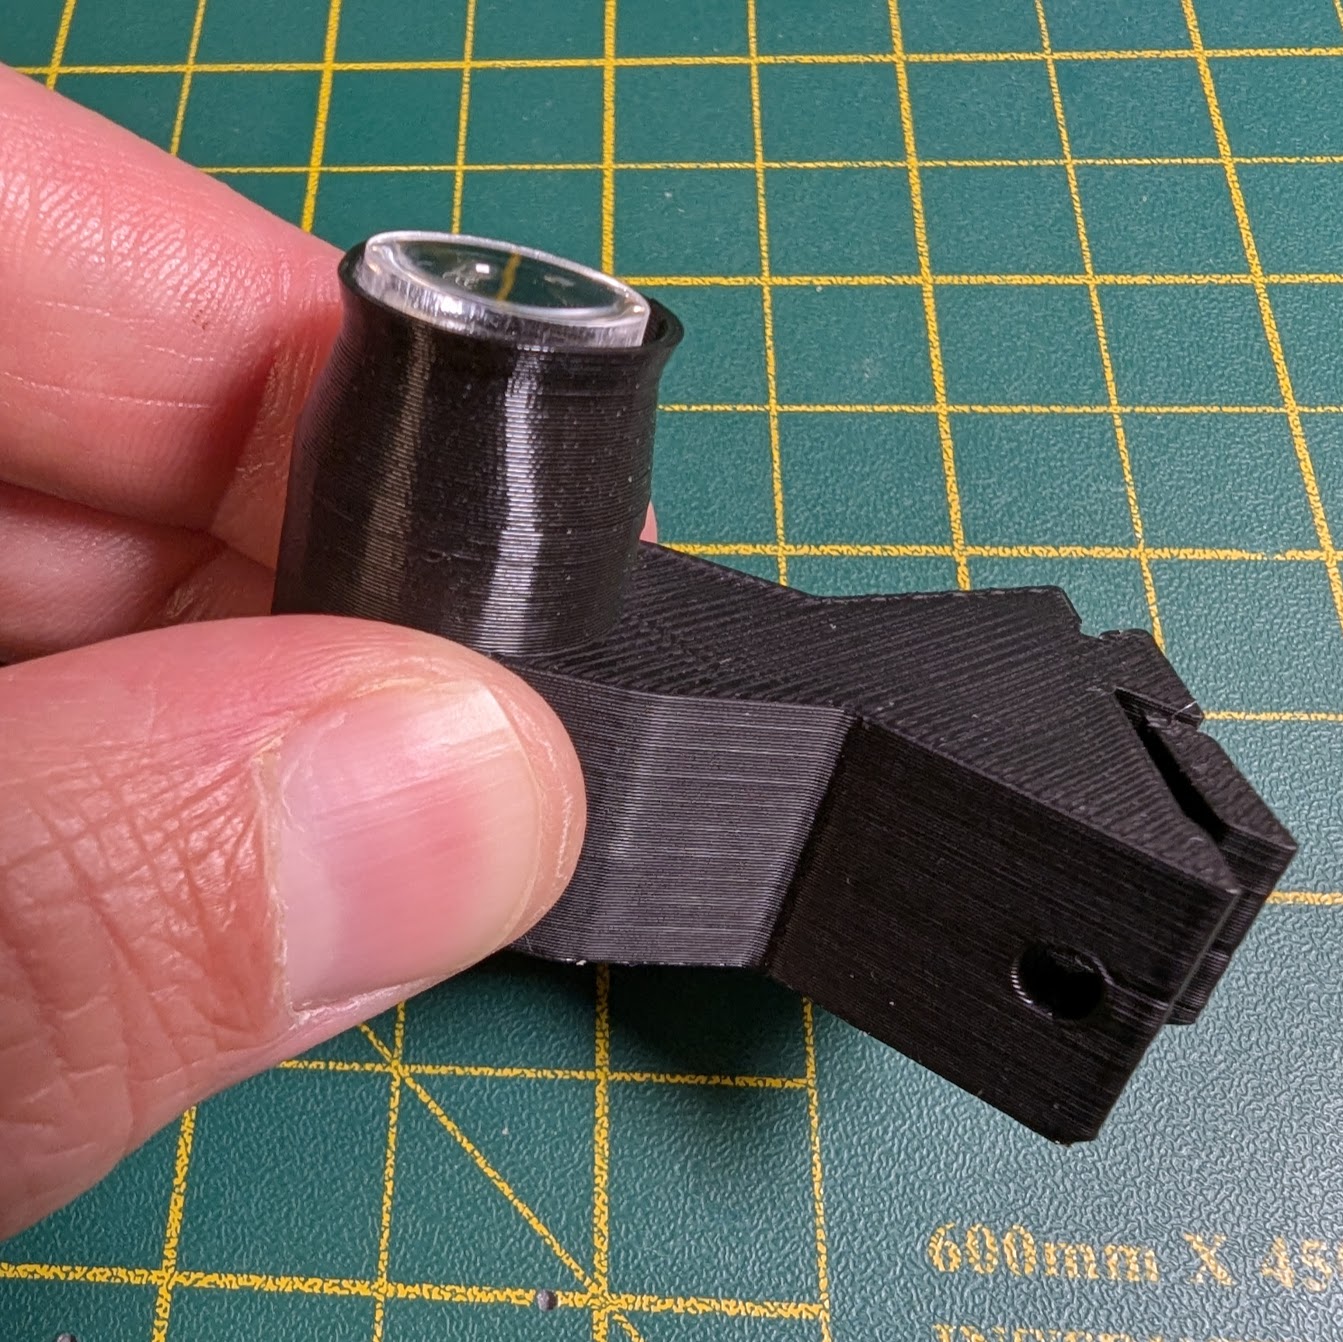
Incorrect lens installed, portruding from the condenser.
Removing the incorrect lens should be easy by pushing on it, as it should be sitting relatively loose in the condenser arm. If it is stuck, you can use the ball-end Allen key to push it out from the other side:
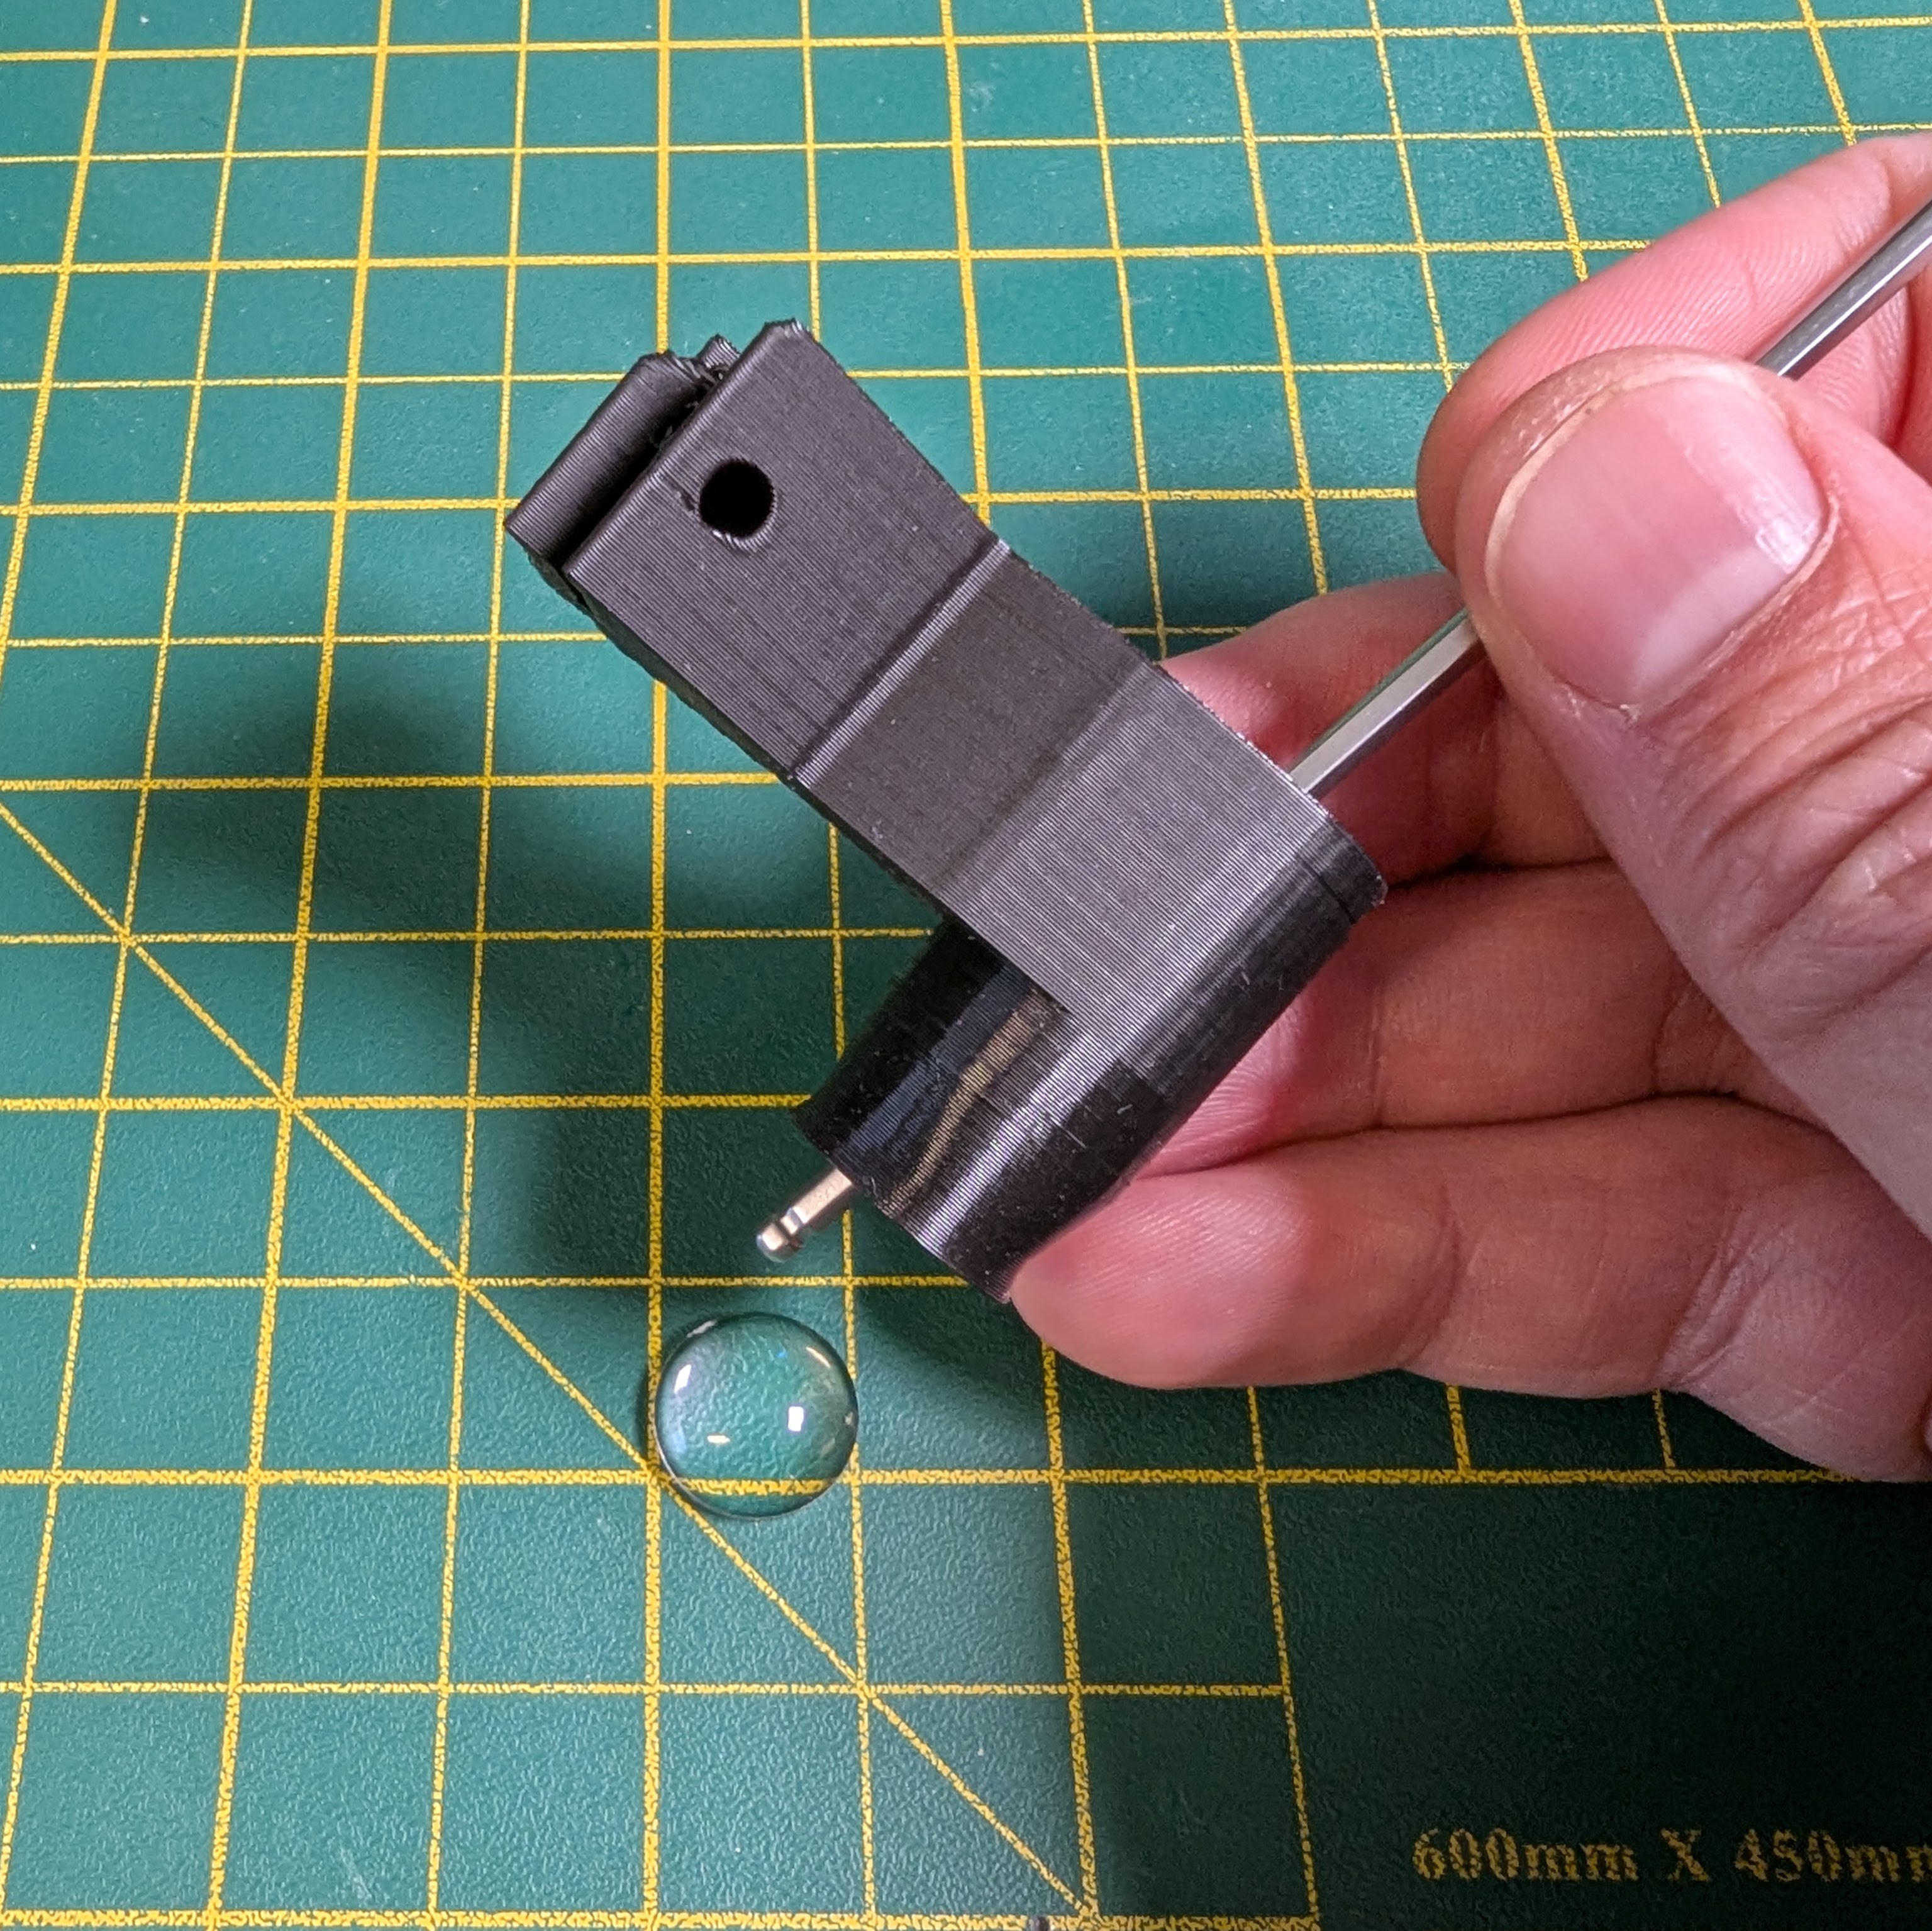
Pushing the lens out with the Allen key.
Once the incorrect lens is removed, you can install the correct lens by following the official OpenFlexure documentation:
- placing the condenser lens on the lens tool flat side down
- taking the condenser arm and align the opening over the lens
- pushing down until the lens clicks into place
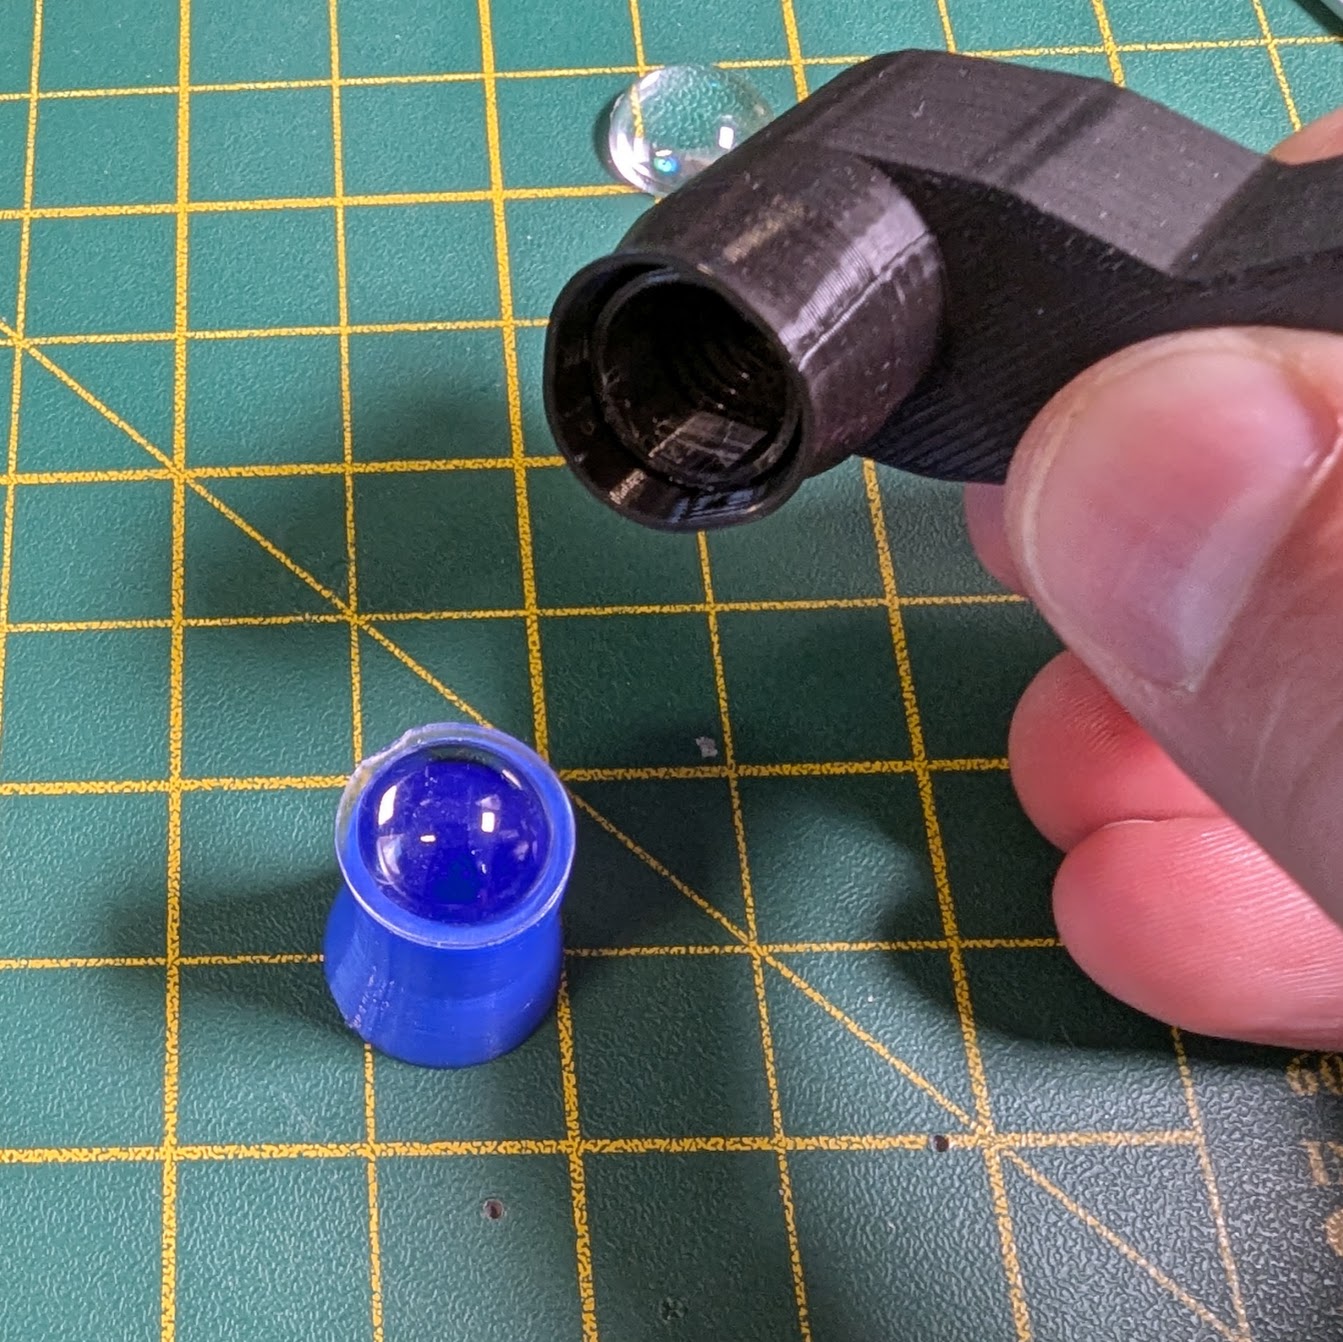
Installing the lens by pushing the condenser arm down until the lens clicks into place.
Visually inspect the positioning of the lens. It should be flat, not seated at an angle. If necessary, push against the lens tool to align it properly:
Lens correctly installed.